Sweet Potato Bread...

>> Monday, 30 August 2010

I know that bread is one of things that can seem like too much effort and mess to make when there are perfectly good, instant options at the supermarket. 95% of the time I will go along with this and just buy those options too. Maybe trying part-baked in some warped attempt to apply domesticity to the pre-produced product and create the smell of warm, bready-comfort throughout the house.

So, I'm not going to argue that you should make this rather than buy bread because it tastes better. It's nice, but with this as an argument, shop-made will often win.

Instead, I think you should make this because the experience of making bread is equally as fulfilling as eating it. Taking the time to mix all your ingredients, 10 minutes of slow kneading, 14 hours of proving and 30 minutes of baking. That's patience. It's a calming, soothing process that focuses on quality and rushing around. It makes me think about that line from a Rudyard Kipling poem "If you can keep your head while all around you are losing theirs".

Take some time for yourself, pummel out your frustrations on the dough and sleep off any stresses whilst it proves. In the morning, wake calm and relaxed and in 25 minutes your home will be filled with the scent of freshly baked bread. You can't get that from a Hovis loaf now can you?????

Sweet Potato Bread


Ingredients (makes 1 large loaf)
  • 500g strong bread flour
  • 150g sweet potato
  • 25g fresh yeast (see Top Tips)
  • 2 tsp salt
  • 250ml warm water

Step 1: Boil the sweet potato in its skin for about 30 minutes. Leave to cool, remove skin and set-aside


Step 2: Place the flour and potato in a large bowl and mix with hands, squeezing the potato into the mix as you go


Step 3: Crumble in the yeast


Step 4: Dissolve the salt in the warm water and add 2/3 to the flour mix. Combine with our hands adding more water as required until you have a firm but not sticky dough


Step 5: Flour your surface and begin kneading. Start by pummeling down the dough with your fist and then folding the dough in half. Repeat this pummel and fold process for about 10 minutes until your dough turns almost elastic


Step 6: Shape into a round loaf, place on a baking sheet and leave to prove for 14 hours

Step 7: Cook in the oven at 220c/GM 7 for about 25 minutes and leave to cool


Step 8: Slice or tear into generous pieces and serve

Top Tips
  • You can get fresh yeast free from your supermarket!!! Just pop your head behind the bakery section and ask for some and they'll get it for you. Who said nothing comes for free?!
  • I think this would benefit enormously from a little garlic oil and chopped rosemary. I'll be adding this to the dough next time I make it. You could always to this first time...
Enjoy!
Helen x

Read more...

Double Layer Chocolate Brownies.....with Raspberry Sauce

>> Saturday, 28 August 2010

I have discovered a great new cook book!

It's called 'Puddings' and is by Women's Weekly. I picked it up a few weeks ago and can't stop making things from it! So much is appealing. I wondered how many calories I would consume if I cooked my way through it a la 'Julie and Julia'. This was a scary concept, so I've just picked the best.

I'm on a mission to perfect the brownie and I'm happy to admit that I'm not there yet! I want something squidgy in the middle, dense and rich on the tongue and a gently cracked top.

This one is from the aforementioned cookbook and is made up of a layer of dark chocolate brownie, topped-off with a layer of white chocolate brownie.

It's exceedingly naughty but rather nice (note the amount of chocolate!!). It's still not perfect, but give me time.......

You should get 16 naughty squares from this amount of mixture. I think it's best served warm with raspberry sauce rolling down the sides.

Double Layer Chocolate Brownies and Raspberry Sauce


Ingredients

  • 125g butter

  • 200g brown sugar

  • 1tsp vanilla extract

  • 4 eggs

  • 75g plain flour

  • 75g self raising flour

  • 100g chopped nuts

  • 200g dark chocolate

  • 200g white chocolate

  • 200g raspberry jam

  • 50ml water

  • 2 tsps cornflour

  • 1tbsp water

Step 1: Preheat oven to 150c and grease and line a medium sized square cake tin

Step 2: Cream butter, vanilla and sugar


Step 3: Beat eggs, one-by-one, into butter

Step 4: Add flour and nuts and stir

Step 5: Melt the chocolate in separate bowls (I microwaved for about 2 minutes each)


Step 6: Divide mixture between 2 bowls and add melted white chocolate to one and melted dark chocolate to the other. Stir to combine


Step 7: Spread dark chocolate mix into the base of the cake pan and then top with the white chocolate mix


Step 8: Place brownie in oven for 1 hour until golden (mine took about 1 hour 15 - use your judgement a little)


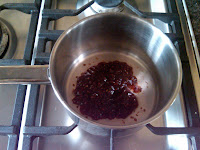
Step 9: Whilst brownie is cooking, make your sauce. Add the jam and 50mls water to a saucepan and gently boil. Mix the cornflour with the tbsp of water to max a paste and add to the hot jam. Simmer until sauce thickens and then pour into a small dish to cool slightly


Step 10: Remove brownie from the oven, allow to cool for 10 minutes before cutting into squares and serving with your raspberry sauce.

Enjoy!
Helen x

Read more...

Perfect Syrup Sponge (easy, easy, easy!!)

>> Monday, 23 August 2010

Recently I had a little operation. Not very serious, but the sort of thing that makes you feel a little sorry-for-yourself and allowably self-indulgent for about 2 days.

However, cooking stops for no cause and it is the perfect medicine to get through such times.

What better way to sooth the soul than with sweet, syrupy sponge?

I’ve always veered away from syrup sponge, believing steaming and pudding basins were required (equals too much effort and high chance of failure). However, I need fear no more because this is the perfect, easiest recipe for syrup sponge ever!

Should my friends ever be in need of comfort, I will come to the rescue (in approximately 35 mins) with this warm, bowl of joy at the ready.

This recipe will be stored in my memory bank for such occasions – definitely one worth trying even for the most under confident!

It's not the daintiest of cakes - but really I think that would spoil it's wholesomeness. That said, you could make this in individual pudding basins should you wish to serve more impressively. I intend to treble the recipe and make one big one in the winter, with 6 friends and a giant spoon to fight over!

A Perfectly Easy Syrup Sponge


Ingredients (serves 2 generously)
  • 3 tbsp golden syrup
  • 50g butter
  • 50g sugar
  • 1 egg
  • ½ tsp vanilla extract
  • 50g self-raising flour

Step 1: Preheat oven to 160c/GM 4

Step 2: Pour syrup into serving dish (I used a oven proof bowl)


Step 3: Cream butter and sugar

Step 4: Mix egg and vanilla into butter mixture

Step 5: Add flour and mix to combine


Step 6: Gently pour over the syrup


Step 7: Bake for 30 minutes until golden


Step 8: Serve with cream/ice cream/custard at once!


Indulge soon!
Helen x

Read more...

Lemon and Earl Grey Madeleines - cakes for ladies!!!

>> Wednesday, 18 August 2010

I’ve been after a Madeleine pan for a while to add to my excessive collection of baking tins and recently came across a bargain in the sales, which led to this delightful experimentation.

Madeleines are a traditional French sponge, lighter than a typical British sponge, made using a special pan to create scallop-shaped cakes.

Their fluted, bite-sized appearance creates an elegant cake, for ladies if you will! Whilst there are undoubtedly times when only a wedge of Victoria sponge will doodle-do there are other times when drops of fragrant sponge are quite necessary for light-indulgence and guilt-free pleasure.

I think this description, from Marcel Proust (in the book 'In Search of Lost Time'), whilst a little grandiose, perfectly sums up their appeal…

"She sent out for one of those short, plump little cakes called petites madeleines, which look as though they had been moulded in the fluted scallop of a pilgrim's shell. And soon, mechanically, weary after a dull day with the prospect of a depressing morrow, I raised to my lips a spoonful of the tea in which I had soaked a morsel of the cake. No sooner had the warm liquid, and the crumbs with it, touched my palate than a shudder ran through my whole body, and I stopped, intent upon the extraordinary changes that were taking place…at once the vicissitudes of life had become indifferent to me..."

How wonderful that a cake could have that effect!
 
Their elegant appearance deserves light, elegant flavours and the words of Proust got me thinking about lemon and tea flavoured Madeleines. Earl Grey, with it's delicate bergamot overtones, was the perfect base and a little lemon and honey provide the flavours to lift this sponge to the very happiest levels.
 
If you've not got a Madeleine pan, you could make small fairy cakes, which will taste just as good.
 
Bon Appetit!
 
Lemon and Earl Grey Madeleines


Ingredients
  • 3 tbsp butter
  • 90g plain flour
  • 1/4 tsp baking powder
  • pinch salt
  • 40g caster sugar
  • 1 Earl Grey tea bag
  • 1 lemon (zested)
  • 1 egg
  • 2 tsp honey
  • 1/2 tsp vanilla essence

Step 1: Preheat oven to 150c/GM 3

Step 2: Melt butter until turning brown

Step 3: Rip open tea bag and grind contents to a fine powder. Add powder to sifted flour, baking powder and salt. Set aside.


Step 4: Rub the sugar and zest together with your fingertips until the sugar feels moist


Step 5: Add the eggs to the sugar mix and beat

Step 6: Add honey and vanilla to egg mixture and beat

Step 7: Fold in flour and Earl Grey mixture

Step 8: Fold in melted butter


Step 9: Pour into tin


Step 10: Chill for 1 hr in fridge

Step 11: Bake for 10 -12 minutes in the oven until risen


Step 12: Leave to cool and serve


Indulge soon!
Helen x

Read more...

Granola Bars - bite-sized energy boosters!

>> Sunday, 15 August 2010

By night I cook and by day I work in Innovation.....

A colleague and I recently ran a breakfast Ideation session. 16 people, gathered at 7.30 a.m. to create ideas for new products and services. Hard at any time of the day, but 7.30 is definitely harder for some than others!

I am an annoying morning-loving person. I can wake up at 5.00 a.m. and I’m happy to chatter away to anyone I happen to encounter at that time (...night owls worst nightmare!). Therefore, a 7.30 meeting for me is quite appealing, others though need a little help being happy at this time and that is where the recipe for these granola bars comes to the rescue.

These bars are packed full of goodness (and quite a few calories I should add!). Nuts, fruits and seeds will nourish from within and provide long-lasting, slow-releasing energy. Of course you could just eat a banana, but where is the fun in that?

These are ridiculously easy to make and this recipe should provide 12 generously sized bars. If you cook it for 15 minutes longer, leave to cool and pulse roughly in a food processor, you can also use this as granola in place of cereal.

For me, success was proven in the meeting with 16 happy, excited people exiting the bean-bag filled room (all the better for creating ideas with!). Clearly, breakfast meetings are not a pre-requisite and these make a great snacking standby at any time of the day!

Fruit, Nut and Cinnamon Granola Bars


Ingredients
  • 100g butter
  • 200g porridge oats
  • 100g sunflower seeds
  • 50g sesame seeds
  • 50g nuts (chopped)
  • 3 tbsp honey or maple syrup
  • 100g light brown sugar
  • 1 1/2 tsp ground cinnamon
  • 150g dried berries (e.g. cranberries, cherries)

Step 1: Heat oven to 150c/GM 3

Step 2: Butter baking tin (for this amount a deepish 18 x 25cm tin is best, but go with what you've got!)

Step 3: Mix the oats, seeds and nuts in a roasting tin, then put in the oven for 5-10 mins to toast.


Step 4: Melt butter with the honey and sugar in a pan.


Step 5: Combine toasted oats, cinnamon and dried fruit and mix until coated


Step 6: Pour into tin and press down. Bake for 30 mins.


Step 7: Cool in tin (very important - it wont stay together unless you let it cool), then cut into 12 bars.


The hardest part here is waiting for them to cool until you eat them! They'll last several days in a air-tight container. You can flex the recipe depending on what ingredients you prefer - I think apricot and hazelnut would be nice for next time....

Hope you enjoy,
Helen x

Read more...

Food for sharing....Chicken, Apricot and Almond Tagine

>> Thursday, 12 August 2010

As you may have gathered, I have a rather sweet tooth..

Even my savoury dishes have a healthy dose of sugar lurking in there somewhere (see recent entry Lamb and Cherry stew). This is definitely not the blog to follow for savoury lovers!

This recipe is from Sarah Raven, a food writer with a really lovely book called Food for Friends and Family, which is sort of the gist of feedahappylife really! Sarah Raven is a gardening expert too, so all of her recipes are filled with punchy flavours and masses of herbs and spices, which I love.

I'm also a big fan of the tagine! There is something decadent (and wholly unnecessary as you can just use a casserole dish!) and wowy about bringing out dinner in a gorgeous, peaked serving dish like this.I rather like this IKEA one (£55) and this Le Crueset one too (£100)....

.....IKEA...... 
                                                                    .....Le Crueset.....

However, this recipe is far from reliant on this extravagance and a heavy bottomed saucepan will work just as well.

This serves 4 greedy or 6 reserved friends and you can stretch it out further with flat breads, cous cous, green salad etc... I think it's nicer made the day before so the flavours infuse. If you're of the same mindset, add the herbs on the day you are actually eating it so they stay green and vibrant.

Enjoy, fellow sweet-toothed readers....

Chicken, Apricot and Almond Tagine


Ingredients
  • 8 chicken thighs
  • 2 onions (sliced)
  • 2 garlic cloves (crushed)
  • pinch saffron threads
  • 1 tsp turmeric
  • 1 tsp ground cumin
  • 1 tsp ground cinnamon
  • 1 1/2 tsp ground ginger
  • 1 1/2 tsp hot paprika
  • 400ml apple juice
  • 400ml chicken stock
  • 250g ready to eat apricots (chopped)
  • 100g whole, peeled almonds
  • large bunch mint (chopped)
  • large bunch flat leaf parsley (chopped)
  • large bunch coriander (chopped)
  • olive oil

Step 1: Lightly brown chicken with a glug of oil over a medium heat


Step 2: Add the onions and garlic and saute for 5 minutes


Step 3: Add the spices and cook for 2 minutes


Step 4: Add the apple juice and stock, stir and simmer for 15 minutes


Step 5: Add apricots and almonds and cook for 15 minutes until liquid has reduced and thickened


Step 6: Before serving, stir through fresh herbs


Step 7: Serve with your selection of accompaniments


Hope you enjoy,
Helen x

Read more...

Blog template by simplyfabulousbloggertemplates.com

Back to TOP